
How often do you check your email? If you’re like 91% of Americans, probably every day. So chances are most of your potential customers are checking theirs as well. Are you in their inbox or is your competition? Does the thought of generating content week after week make you nervous? Maybe you’ve tried it before but fell off the wagon a few weeks in. Let’s discuss what we’ve found to be the easiest way to consistently reach out to your customers in a meaningful way.
1. Generate Evergreen Content
The first step should be to start writing (or hire someone to start writing). After all, what are you going to be sending out? The structure and amount of your content are paramount in determining exactly what you’re email marketing strategy will look like. If you write a series on how to take better photos maybe those 5 articles would go out once a week. Maybe you want to highlight a short piece someone else wrote about your company along with an employee profile once a month. Maybe you want to offer quarterly discounts on different types of products. Or maybe you’re a hardware store and would like to send out instructions for different projects every other week.
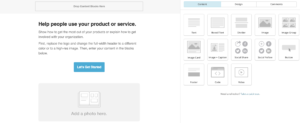
2. Create a visually pleasing and easily navigable email template
Now that you’ve got at least one set of articles, where do you put them? Find an email marketing program like AWeber or MailChimp. Each of these will have the ability to create templates, though the level of flexibility with each may vary. Begin placing your content and designing the visual portions of your email as you wish. Maybe there’s a small logo in the bottom, maybe there are horizontal lines between each content block.
3. Gather your list
Next, you need someone to send it to right? f you already have an email list, maybe in a spreadsheet or built in your contact, find the import function of your chosen email client and upload that. Then create a sign-up form on your website or have your web designer do this. Be sure it’s easy to find and placed in multiple places. For more in-depth reading on where to place your sign up form – check out this great article by social triggers.
4. Set up and start your automation
Each of these email clients will have the ability to automate and segment your list. Set triggers for when to start sending out the first email – maybe a welcome email immediately upon signing up and one article a week every week thereafter. You also have the ability in several programs to segment your list based on their interactions with your previous email. Maybe they clicked on the “how to build a chicken coop” article, so now they’ll also start getting your “how to raise chickens” blog series. Or maybe they clicked on a special deal for one brand but not any of The others, you can choose to send them more of the other products or focus on the brand they liked. You choose how they move through your workflow. This is quite possibly the most time intensive part, but it’s worth it once it’s all set up. Once this is done you can set it and forget it for the most part.

5. Send out time-sensitive emails as needed
Now that your customers are regularly receiving your emails and engaging with them, you can insert more timely emails as needed. Maybe you want to send out information on a holiday sale or remind clients of your recent community involvement. Either way, your workload is now reduced to simply shooting out emails as needed with customers continuing to engage with your content years after it’s been published.
As you published new content, add it to your workflow. Pretty soon you’ll have months or even years worth of emails set up and going out regularly without you touching it. With you controlling the order in which information is digested.
